Questo mese, per il tema "Anything Goes' sul TIMI CraftStamper challenge blog vi mostrerò come creare un porta laptop da zero, con stencils, colori acrilici e timbri.


With a leftover I create a luggage tag:
Con l'unico avanzo, ho creato una tag:

Che, naturalmente, nasconde l'indirizzo

Gesso the canvas (or, like me, I used a cream chalky paint)
Ho usato la stessa tecnica del video 'Come usare gli stencils sulla stoffa": ho usato un avanzo di canvas cucendolo poi su un lato.
Gessare il canvas:

Lay the stencils
Posizionare gli stencils

And spray spray spray with acrylic paint (a bit of paint and water mixed in a spray bottle).
Spruzzare come se non ci fosse domani (io ho usato colori acrilici in una bottiglietta spray con acqua)
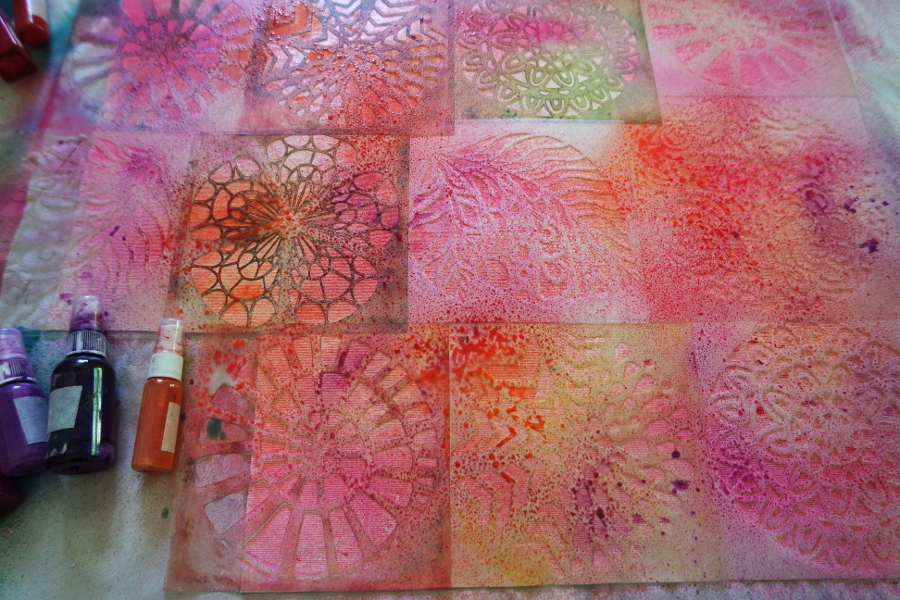
And, when dry, sponge through the stencils with acrylic paints
Tamponare il colore acrilico puro attaverso lo stencil

Lay the batting ( I just put it on one side)
Posizionare l'imbottitura
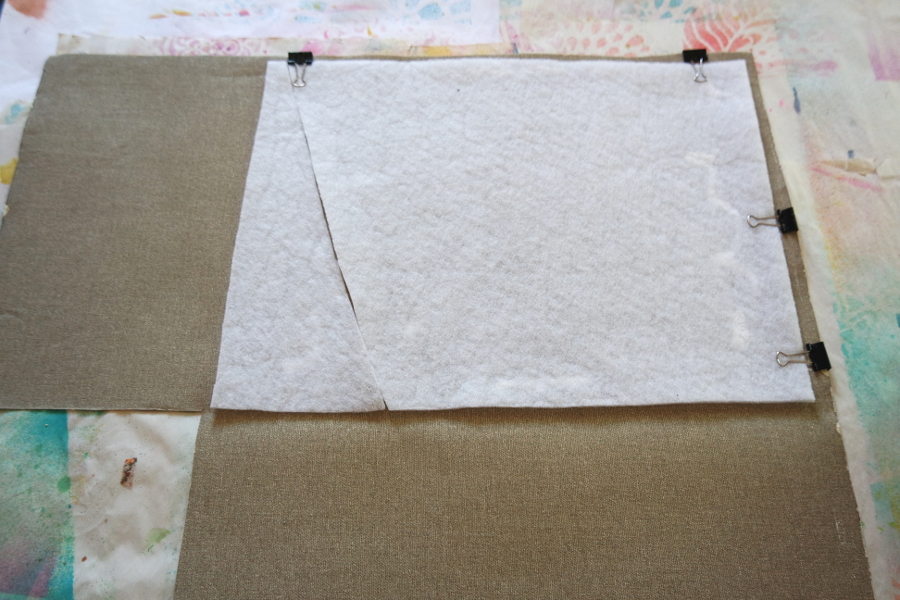
And sew the lining
E cucire la fodera interna

Stamp stamp stamp with your favourite stamps using black archival ink or acrylic paint.
Stampare furiosamente con acrilico o tampone permanente.

Add some doodle with black markers.
Aggiungere dei doodles o cornicette.

Sew along the sides (or one side, like me)
Chiudere cucendo lungo il bordo.
This month's sponsor is

And you can win these three beautiful stamps:

12 commenti:
Wow! Thanks for the tutorial! Such a great utility! LOVE it!! :)
Super creation Gio. Love the colors and stamping!
Belloooo!!!!! Se vedessi qualcuno per strada con questo portalaptop riconoscerei immediatamente il tuo magico tocco!!!
...Il tuo "Stampare furiosamente" mi piace un sacco! Ti ci vedo! :D :D
What a fabulous project .... so bright and colourful too xx
Wonderful vibrant colours. Your stencils are perfect for overlapping without losing the patterns xx
So beautiful!! Thank you for the tutorial Gio!! hugs,Jackie
Wonderful, thank you for the tutorial! Deb xo
Fortissimo questo tutorial!!Comunque il risultato è ottimo!!
It's beautiful, clever lady! xx
Spettacoloso, veramente! Una sferzata di vitalità energia passione tutto in un unico progetto e... grazie per il tutorial!
Wow Gio! this is amazing :) xx
I tuoi colori sono sempre favolosi, questo progetto fantastico ! Barbara
Posta un commento